Everyone has experienced this scenario: you’re pressed for time, needing to quickly delete old resources just before the weekend. But making decisions under pressure often leads to mistakes.
What could possibly go wrong?
Cleaning up your cloud environment involves identifying unused or unchanged resources and adding them to the deletion list. On a busy Friday, you might run a script to find these resources and skim through the results, deciding they are safe to delete.
Suddenly, you realize you’ve made a critical error. That unchanged resource with the cryptic name? It was your Virtual WAN connecting your headquarters, subsidiaries, and Azure. Accidentally deleting it means hours to reprovision and potentially days to reconnect all VPNs and ExpressRoute connections.
Such costly mistakes can be avoided with Azure Resource Locks.
What are Azure Resource Locks?
Azure Resource Locks are settings that protect your resources from accidental modifications or deletions. These locks are flexible and can be applied to most services. There are two main types:
- Delete Lock (CanNotDelete): Allows modifications but prevents accidental deletions of resources.
- Read-Only Lock: Prevents any changes to a resource, blocking both modifications and deletions.
Example: Delete Lock
A delete lock ensures that essential resources, like a Virtual WAN or critical networking services, are protected from being mistakenly deleted.
Example: Read-Only Lock
A read-only lock is useful for services that shouldn’t be changed, like key configurations or crucial infrastructure elements.
How to apply Resource Locks in the Azure Portal
Applying a Resource Lock in the Azure Portal is straightforward. You can lock resources at both the resource and resource group levels.
Navigate to the specific resource or resource group. Go to Settings > Locks.
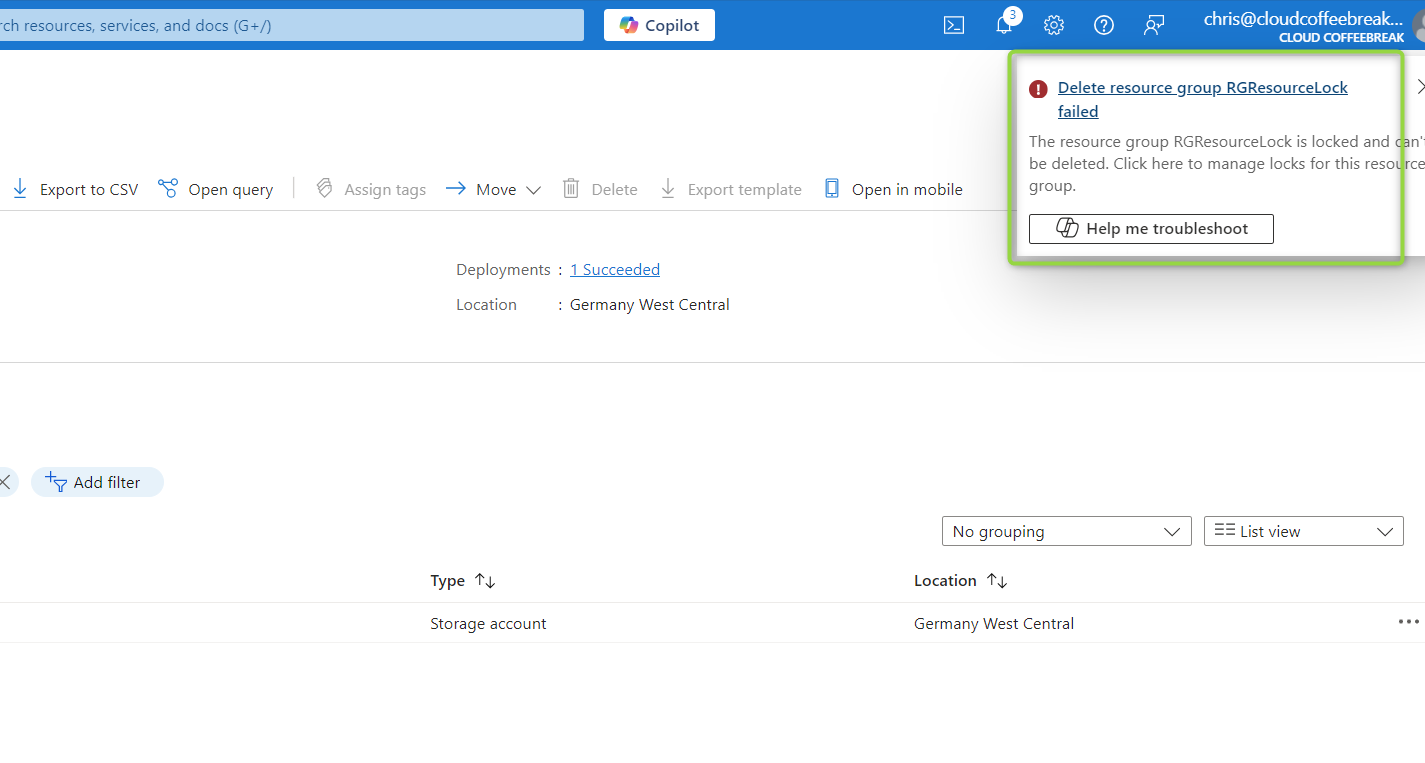 After adding a lock: You won’t be able to delete the resource.
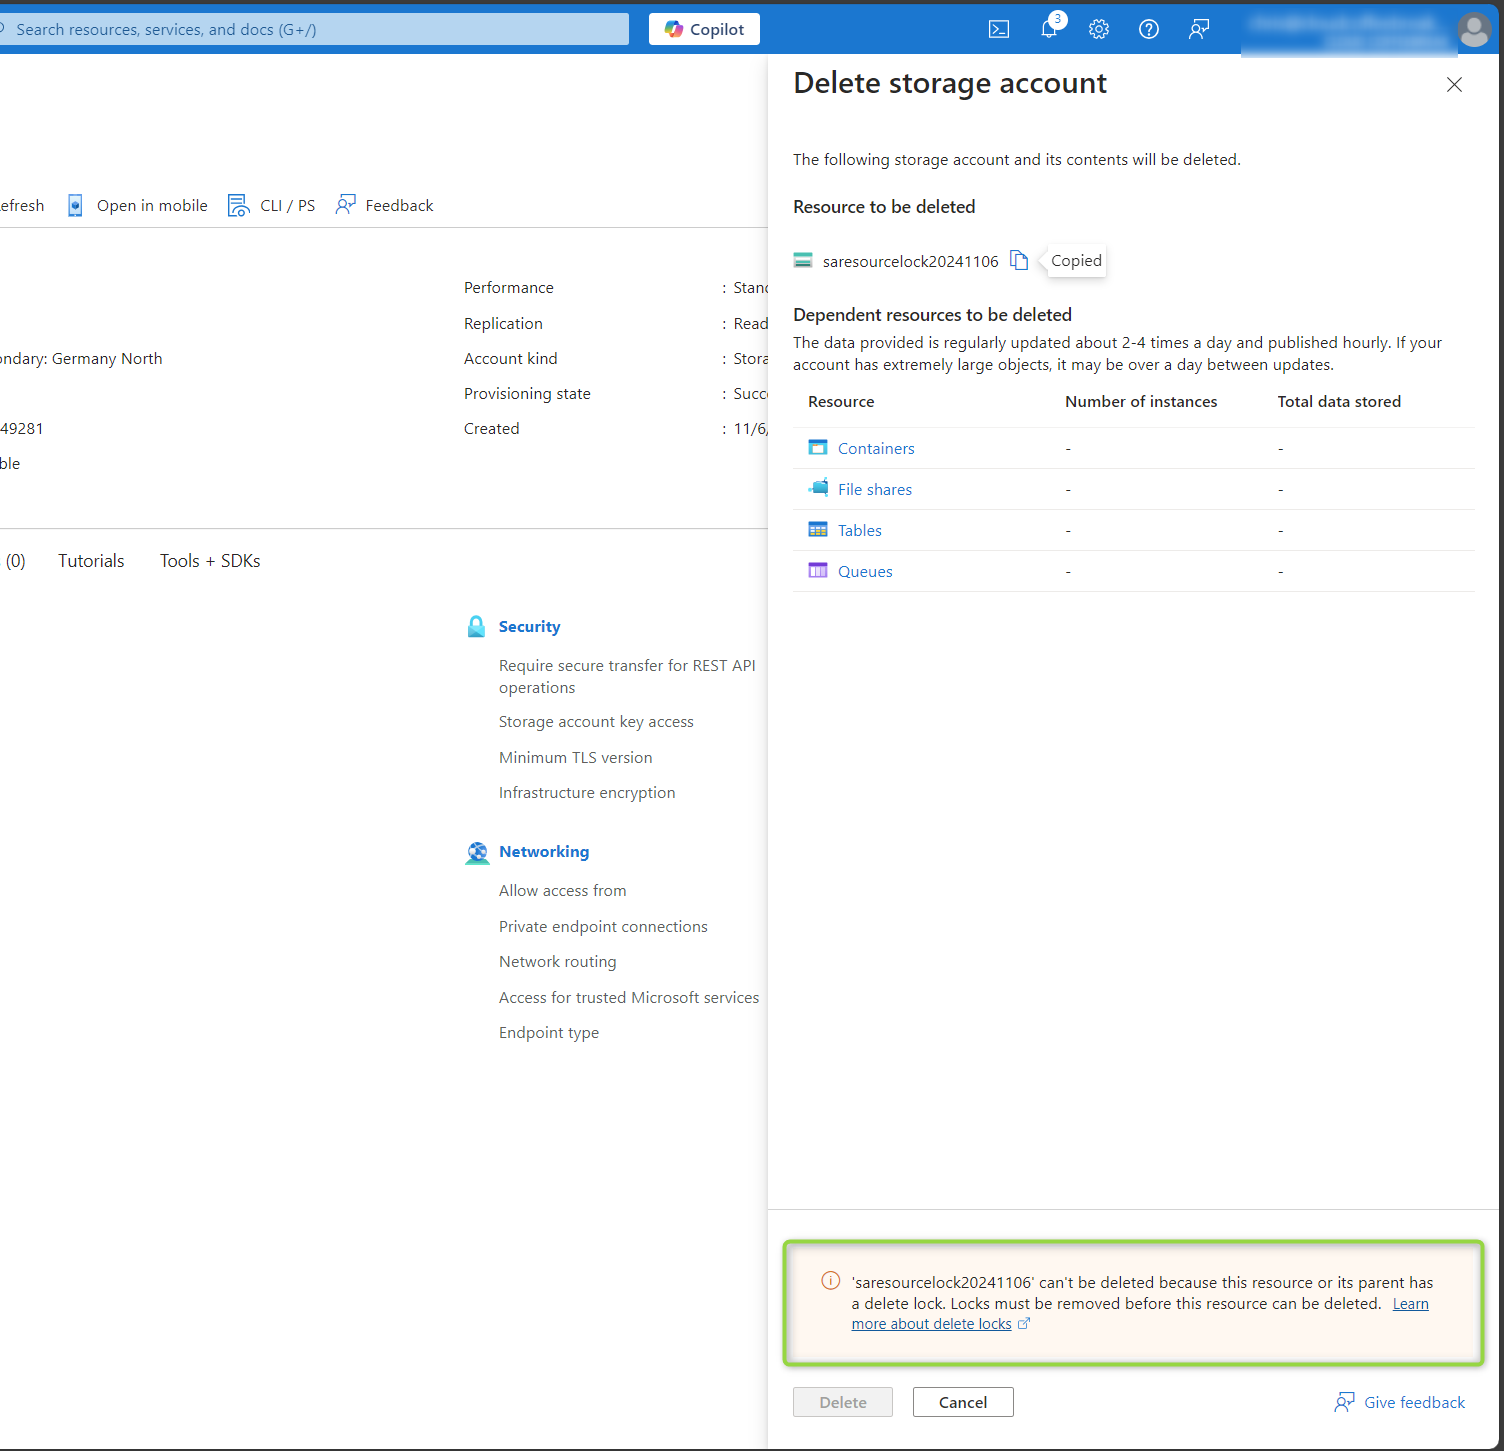 Nor can you delete the resource within the resource group.
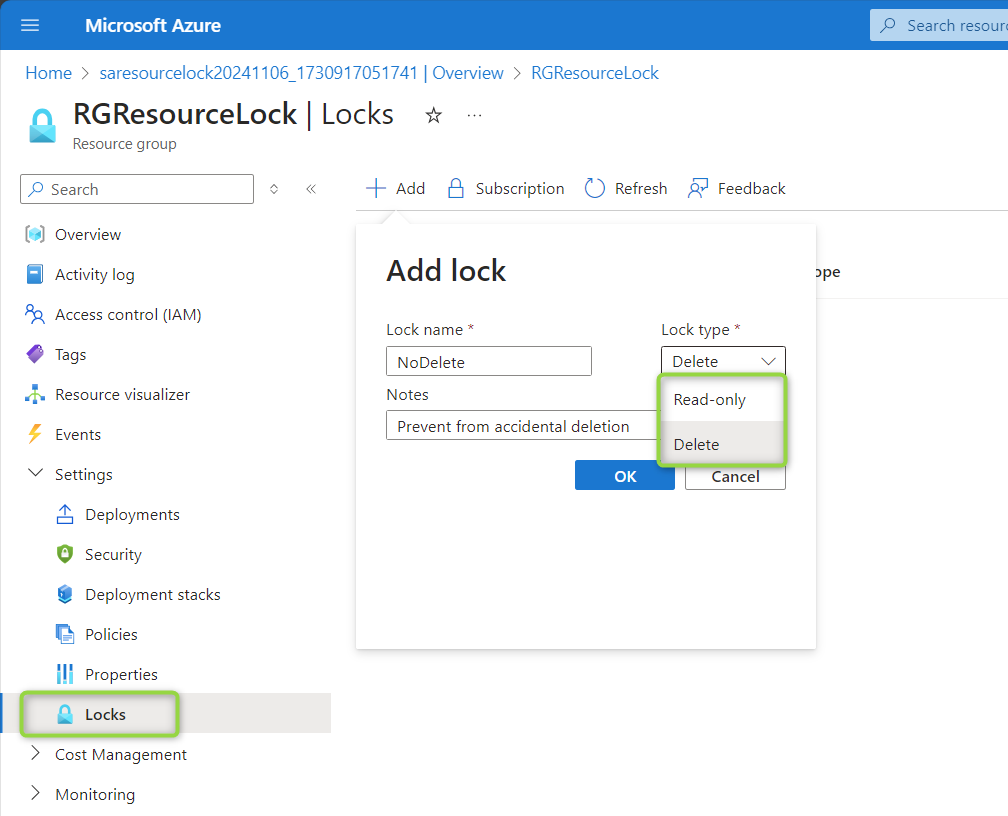 Click Add to create a new Resource Lock. Choose the lock type (Delete or Read-Only) and provide a name for the lock.
The lock can only be managed by users with the Owner or User Access Administrator roles or custom roles with the Microsoft.Authorization/locks/* permission.
How to apply Resource Locks using Azure CLI
Resource locks can also be created using the Azure CLI, such as in the Azure Cloud Shell. Here’s an example command:
az lock create --name LockGroup --lock-type CanNotDelete --resource-group RGResourceLock
 USe Azure Cloud Shell to adding a resource lock.
Limitations of Azure Resource Locks
While Resource Locks are powerful, they do have limitations:
Read-Only locks on storage accounts may prevent certain actions, such as listing keys or modifying RBAC assignments. A Read-Only or Delete lock on a storage account does not prevent data deletion within the account. A Read-Only lock on a resource group containing an App Service plan prevents scaling the plan. A Read-Only lock on a resource group blocks the movement of resources into or out of the group, although a locked resource can still be moved to another group. For a comprehensive list of limitations, check this Microsoft documentation.
Conclusion
Azure Resource Locks are an essential tool for preventing accidental modifications or deletions of critical resources, such as networking services, domain controllers, and other vital infrastructure. Implementing these locks can save your team from potential downtime and costly recovery efforts.
Happy optimizing!